3D 1
Well Seasoned
by Crystal Marsolek @Cake_Cutie · submitted Aug 16, 2011 · 2011 contest
1 / 29
Description
OK, so just the thought of making a cake that was going to be judged by my two favorite people; Bakerella and Mary Alice scared me to death. Then after seeing some of the recent entries I started loosing my "mojo" if you know what I mean! PHEW, tough competition! But I knew if I didn't enter I would forever be wondering "What if?"... So, Here goes!
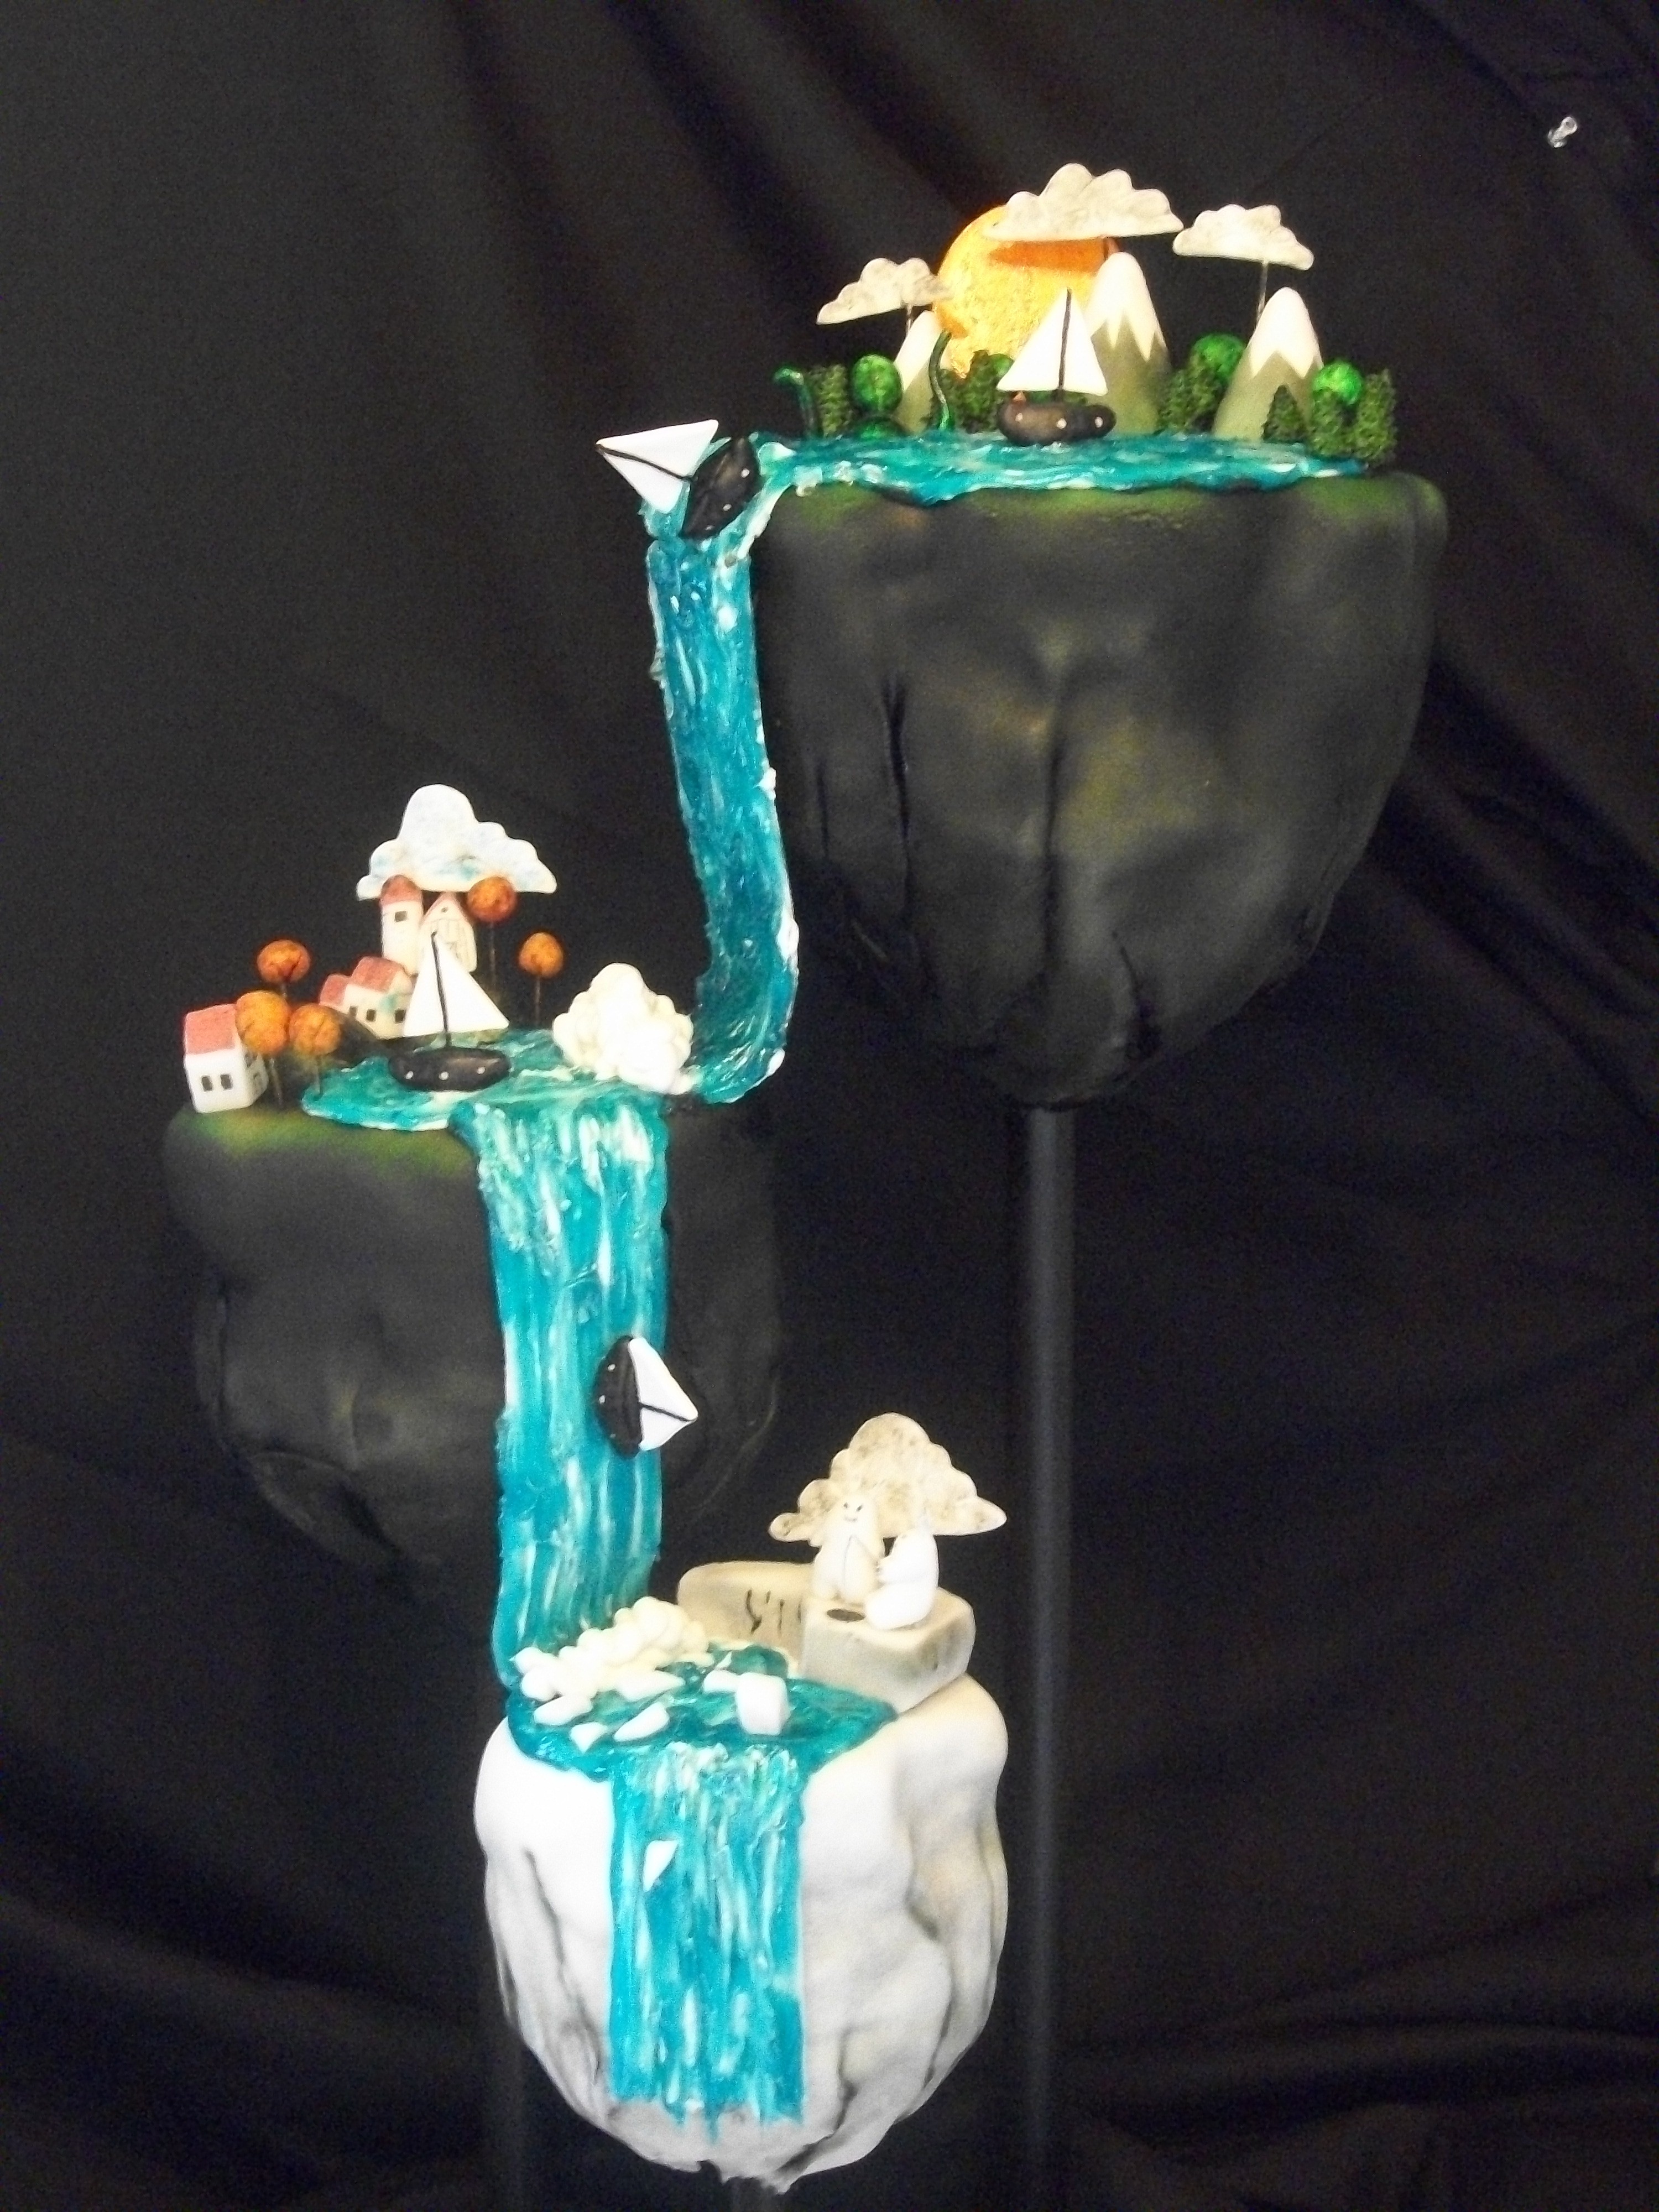
I chose the Changing Seasons design because I knew it would be challenging and it would allow me to use several different types of media and techniques. Plus, being from the midwest the changing of the season is one of the coolest things you will ever see!
I started by baking three layer round cakes for each tier in three different sizes and falvors: 12 inch choclate peanut butter, 10 inch lemon poppy seed, and 8 inch vanilla mint.
After freezing those I went on to making the structure. Now I know that part of the rules was to use as little unedible product as possible, but with this design I had to have a base. Thanks to my wonderful husband! I used a square wood base, with three wood dowels and then three wood circles on top for the cakes to rest on. All painted black so they are less visible in the end. Under the cake bases were rice crispy treats "glued" on with royal icing. I wasn't sure if this would stick, but it did.... WELL!!!
The next step was to make all the small detail sculpture: houses, trees, clouds, moutains, ect. Most were sculpted from fondant and some from gumpaste. This step took at least 6 hours and more after they were all hand painted.
On assembly day I had some great family there to help so I got going! I stacked, carved and frosted all three tiers. 4 lbs of buttercream!!! I tried to carve in some dents and irregular spots to make them look more like chucks of earth. After letting the frosting set I proceeded to cover each tier in fondant. That was a bit of a challenge as the shape of the tiers made a smooth finish nearly impossible, but I found that those cracks and wrinkles actually added to the "earthy" look! I then airbrushed the tiers; black, green, orange, yellow, and red. Once the airbrushing dried I started working on the waterfall. The base of the waterfall was a thicker layer of fondant stuck from one ltier to another. Then I spread on a thin layer of buttercream and then used tinted piping gel piped on and used a wood dowel and dragged it through piping gel and frosting mixture to make it look like a water fall. I then used the piping gel and frosting mixture to make the ponds on each layer making a "wave" effect with my spatula. After this was done it was time to put on the details. They are all stuck with buttercream except the clouds and those are attached with toothpicks.
And of course as you can see by the pictures it was enjoyed by all... even the dogs got a piece! Thank you so much for giving us the opportunity!!! God Bless!!!