3D 1
Sushi
by Melinda Leung @leung3356 · submitted Aug 16, 2011 · 2011 contest
1 / 45
Description
Our cake story: Year 2 - The Sleeping Sushi (and Their Unfortunate Ending)
So once again me and my friend find ourselves faced with yet another threadcakes challenge. After last year's somewhat successful cake making adventure, we decided give it another try and this year we're determined create a 3D cake and finish it!
Let the "Sushi" journey begin:
Planning: the blueprint idea
Luckily both of us had enough materials/ingredients between the both of us that no actual ingredient shopping was needed. Only a small trip to the pantry/cabinet/under our beds/in the closet, etc and we have all our baking needs :). Here's what we came up with:
- cake flavor: lemon
- cake frosting: vanilla cream cheese frosting with lemon zest
materials:
- 2 8"x8" baking pans
- color dyes and white fondant
- baking pan spray (3)
- and of course mixing gadgets and little what nots
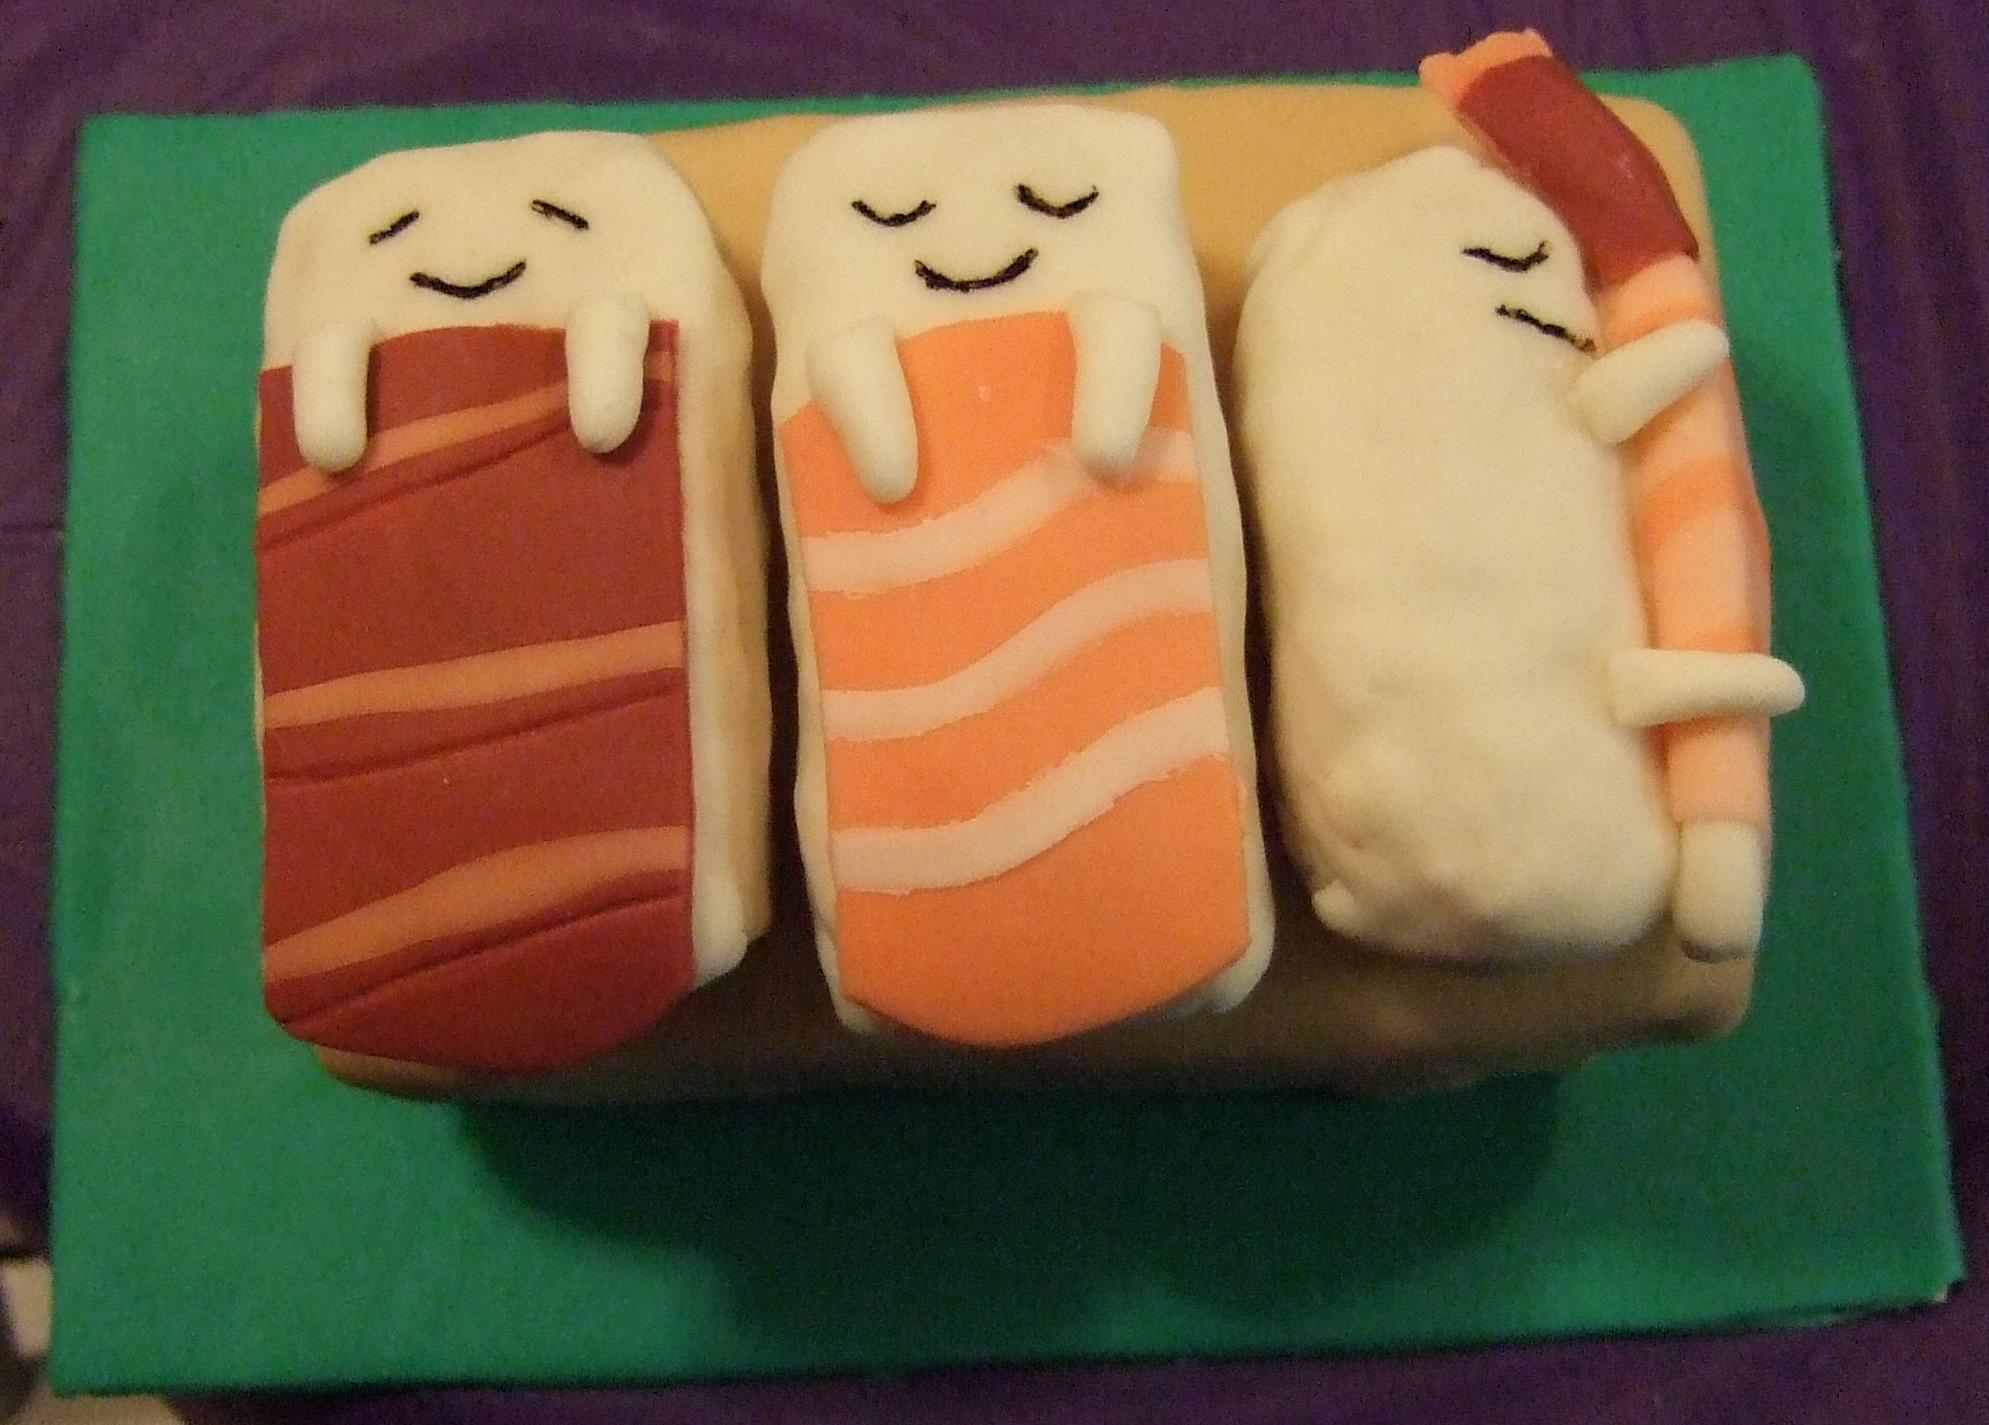
We wanted to make everything out of cake this year and since everything is more or less a rectangle (table, sushi pieces, the table legs) that shouldn't be a problem. For the green background we decided we wanted to just wrap green fondant on the cardboard base the cake will sit on. The only part that posed a slight problem was giving the "sushi" rolls their rice texture...so after some discussions, we decided before we cover the "sushi" in fondant we were going to frost those pieces and roll them in rice krispies then wrap white fondant on top of them for the rice effect. Tuna, salmon, and shrimp "blankets" were to be constructed out of colored fondant and then volia, put together, perfection!
...well as close as we can get anyways...
Day 1: baking
Relatively self explanatory...mix, bake, and cool.
Day 2: frosting/fondant coloring
Part 1 - Mixed frosting ingredients together and give the cooled cake ("table" where the sushi was to rest on top of) a crumb layer and put into freezer. Afterwards, I cut the remaining cake into their perspective characters (sushi, table legs, etc)
Part 2 - Colored the white fondant to match all the different color palette in the cake design. We acquired extra help for this part ;).
Day 3: putting the whole thing together
Part 1 - we rolled and covered all the cake pieces using the colored fondant and then quickly assembled the cake...went a lot faster and smoother than last year I must say....and we even named the sushi pieces George, Ashley, and Charlie :).
Part 2 : (the tragic end) After the cake was nicely assembled we decided to snap a few finishing pictures of ourselves and the cake and call it a day... well unfortunately since there was no one there to assist in helping us take our "family" portrait...we had to be creative so we decided that we can just TILT the cake a little while I hold the camera @ a high angle and click.....WELL there was good and bad news that came from that scene. The GOOD we took all the necessary pictures....the BAD when we tilt the cake to take the last few pictures (probably use to the heat) the cake decided it wanted to meet the kitchen floor... Needless to say.... it had a very tragic ending. We try to save as much as we could but George didn't quite make it...may he rest in peace... :P
the end.
So once again me and my friend find ourselves faced with yet another threadcakes challenge. After last year's somewhat successful cake making adventure, we decided give it another try and this year we're determined create a 3D cake and finish it!
Let the "Sushi" journey begin:
Planning: the blueprint idea
Luckily both of us had enough materials/ingredients between the both of us that no actual ingredient shopping was needed. Only a small trip to the pantry/cabinet/under our beds/in the closet, etc and we have all our baking needs :). Here's what we came up with:
- cake flavor: lemon
- cake frosting: vanilla cream cheese frosting with lemon zest
materials:
- 2 8"x8" baking pans
- color dyes and white fondant
- baking pan spray (3)
- and of course mixing gadgets and little what nots
We wanted to make everything out of cake this year and since everything is more or less a rectangle (table, sushi pieces, the table legs) that shouldn't be a problem. For the green background we decided we wanted to just wrap green fondant on the cardboard base the cake will sit on. The only part that posed a slight problem was giving the "sushi" rolls their rice texture...so after some discussions, we decided before we cover the "sushi" in fondant we were going to frost those pieces and roll them in rice krispies then wrap white fondant on top of them for the rice effect. Tuna, salmon, and shrimp "blankets" were to be constructed out of colored fondant and then volia, put together, perfection!
...well as close as we can get anyways...
Day 1: baking
Relatively self explanatory...mix, bake, and cool.
Day 2: frosting/fondant coloring
Part 1 - Mixed frosting ingredients together and give the cooled cake ("table" where the sushi was to rest on top of) a crumb layer and put into freezer. Afterwards, I cut the remaining cake into their perspective characters (sushi, table legs, etc)
Part 2 - Colored the white fondant to match all the different color palette in the cake design. We acquired extra help for this part ;).
Day 3: putting the whole thing together
Part 1 - we rolled and covered all the cake pieces using the colored fondant and then quickly assembled the cake...went a lot faster and smoother than last year I must say....and we even named the sushi pieces George, Ashley, and Charlie :).
Part 2 : (the tragic end) After the cake was nicely assembled we decided to snap a few finishing pictures of ourselves and the cake and call it a day... well unfortunately since there was no one there to assist in helping us take our "family" portrait...we had to be creative so we decided that we can just TILT the cake a little while I hold the camera @ a high angle and click.....WELL there was good and bad news that came from that scene. The GOOD we took all the necessary pictures....the BAD when we tilt the cake to take the last few pictures (probably use to the heat) the cake decided it wanted to meet the kitchen floor... Needless to say.... it had a very tragic ending. We try to save as much as we could but George didn't quite make it...may he rest in peace... :P
the end.