3D
Something Strange In Your Beverage
by Ashley Jones @akjonesie · submitted Jul 26, 2010 · 2010 contest
1 / 71
Description
Browsing through the Threadless site, I saw the “Something Strange, In Your Beverage” design and knew I had to use it. I ain’t afraid of no ghosts! The goal of my cake was to have a scene within the cake. I’ve never seen this before and thought I would give it a try. Why not? In the “Rules” section, you said to be creative and that the cakes are an interpretation of a design, so I thought I’d take your guidelines to their fullest meaning. I hope you enjoy my shirt-inspired creation as much as I do.
I sketched out my design and got to work… a little backwards, but I got to work. Never having done something like this before, well, let’s just say I learned a lot during this process, like not baking the cakes first or stacking and covering the cakes then letting them settle for three days.
The cakes were 6” vanilla pound cakes. And I mean VANILLA – 4T of vanilla in each batch – YUM! I wish I could insert a scratch and sniff right so you could at least smell the cakes. I’m pretty certain you’d start drooling. (I added some cocoa to the batter for coloring to make it look like hot chocolate.) Since I baked the cakes first, I put them in the freezer until I was ready to stack them. I then made some marshmallow fondant. The first batch was a fail because it was way too soft, so I had to make another batch. I kept the first anyway, which turned out handy for some of the later design elements.
I tried to form Slimer out of fondant, but given the size of him, he just flopped. I happened to have a Rice Krispies Treat mix on hand, so I whipped that up and formed Slimer’s and Stay Puft’s bodies. I then covered Slimer’s body with green fondant and started molding away one fat roll at a time. I woke up the next morning and found that my three-year-old was trying to “help” by poking holes in Slimer with the fondant tools I had left out on the counter, so I had to recover him in fondant. *sigh* I can’t blame the little guy – those tools just cry out to be played with. Creating Slimer’s face was the most fun task of the entire process. I had to carve into the Rice Krispies Treat to give his mouth depth, then covered it in black fondant. The teeth are formed from the white Christmas sprinkles that I delicately cut.
Stay Puft was next and as you can see in some of my pictures, I had to do a little brain surgery to get his head proportioned to the rest of his body. I first drew in his eyes and mouth with edible marker but didn’t like the way it looked, so I covered them in black fondant.
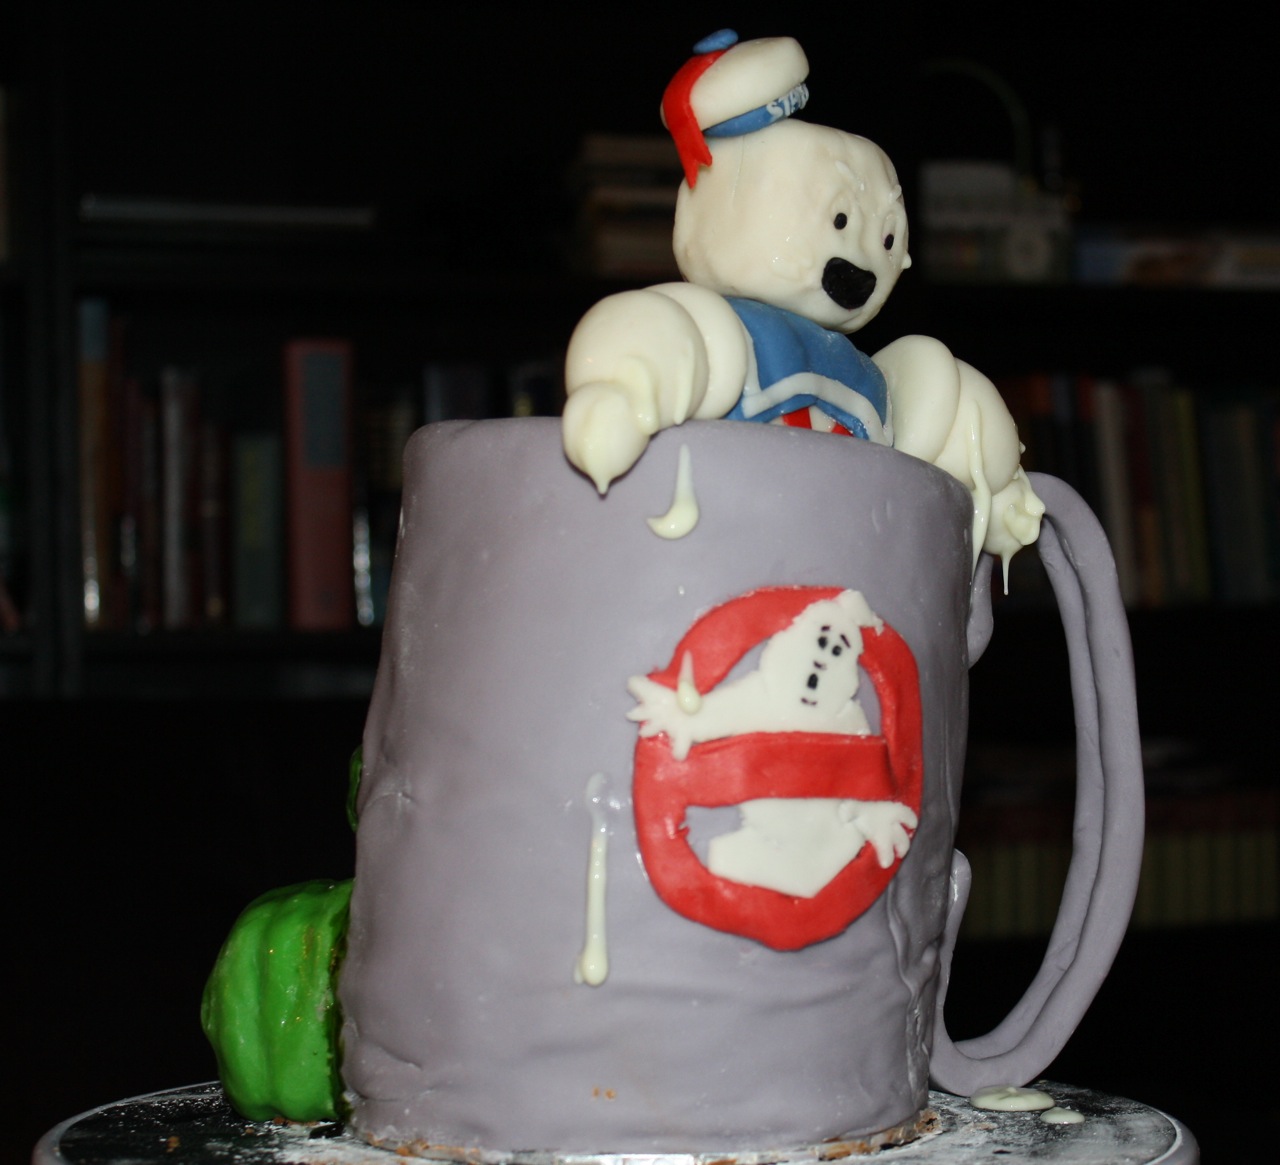
The icing was buttercream, again with some cocoa added for color. This also helped tame the sweetness of the buttercream and may now be my new favorite recipe. Stacking the cake was a challenge as I had to plan out Slimer’s and Stay Puft’s placement so when I cut into the cake, you would see the “scene.” Once stacked, I covered the cake with buttercream then fondant. I put the Ghostbusters’ logo on the cake, then realized I put it on the wrong side. Who does that?! I put Stay Puft in the mug and attached his body parts using water. I poured in the “hot chocolate” (melted chocolate chips, butter, and heavy cream). Then I put the handle on the mug using 4 toothpicks for stability, but those are the ONLY non-edible items I used. I squeezed out the insides of some Lindor white chocolate truffles as the melted parts of Stay Puft. I made some slime for Slimer using corn syrup and green food coloring. I then repositioned the logo, cleaned Slimer up, and then voila, finished cake. I cut into the cake and you can’t see the "scene" as well as I hoped. The “scene” is Slimer eating Stay Puft’s leg. After all, Slimer eats everything.
All in all the cake took me about 10 days to make. I work full time and have two little boys, so I could only work on it 3-4 hours each night. This was a great experience and I hope to enter again next year. Thank you for this opportunity! Who ya gonna call?
PS – Don’t be jealous of my stunning gold backsplash or putrid yellow countertops – they’re… antiques. Also, I have over 450 photos of the process, so if you want any more, just ask. Thanks again!
I sketched out my design and got to work… a little backwards, but I got to work. Never having done something like this before, well, let’s just say I learned a lot during this process, like not baking the cakes first or stacking and covering the cakes then letting them settle for three days.
The cakes were 6” vanilla pound cakes. And I mean VANILLA – 4T of vanilla in each batch – YUM! I wish I could insert a scratch and sniff right so you could at least smell the cakes. I’m pretty certain you’d start drooling. (I added some cocoa to the batter for coloring to make it look like hot chocolate.) Since I baked the cakes first, I put them in the freezer until I was ready to stack them. I then made some marshmallow fondant. The first batch was a fail because it was way too soft, so I had to make another batch. I kept the first anyway, which turned out handy for some of the later design elements.
I tried to form Slimer out of fondant, but given the size of him, he just flopped. I happened to have a Rice Krispies Treat mix on hand, so I whipped that up and formed Slimer’s and Stay Puft’s bodies. I then covered Slimer’s body with green fondant and started molding away one fat roll at a time. I woke up the next morning and found that my three-year-old was trying to “help” by poking holes in Slimer with the fondant tools I had left out on the counter, so I had to recover him in fondant. *sigh* I can’t blame the little guy – those tools just cry out to be played with. Creating Slimer’s face was the most fun task of the entire process. I had to carve into the Rice Krispies Treat to give his mouth depth, then covered it in black fondant. The teeth are formed from the white Christmas sprinkles that I delicately cut.
Stay Puft was next and as you can see in some of my pictures, I had to do a little brain surgery to get his head proportioned to the rest of his body. I first drew in his eyes and mouth with edible marker but didn’t like the way it looked, so I covered them in black fondant.
The icing was buttercream, again with some cocoa added for color. This also helped tame the sweetness of the buttercream and may now be my new favorite recipe. Stacking the cake was a challenge as I had to plan out Slimer’s and Stay Puft’s placement so when I cut into the cake, you would see the “scene.” Once stacked, I covered the cake with buttercream then fondant. I put the Ghostbusters’ logo on the cake, then realized I put it on the wrong side. Who does that?! I put Stay Puft in the mug and attached his body parts using water. I poured in the “hot chocolate” (melted chocolate chips, butter, and heavy cream). Then I put the handle on the mug using 4 toothpicks for stability, but those are the ONLY non-edible items I used. I squeezed out the insides of some Lindor white chocolate truffles as the melted parts of Stay Puft. I made some slime for Slimer using corn syrup and green food coloring. I then repositioned the logo, cleaned Slimer up, and then voila, finished cake. I cut into the cake and you can’t see the "scene" as well as I hoped. The “scene” is Slimer eating Stay Puft’s leg. After all, Slimer eats everything.
All in all the cake took me about 10 days to make. I work full time and have two little boys, so I could only work on it 3-4 hours each night. This was a great experience and I hope to enter again next year. Thank you for this opportunity! Who ya gonna call?
PS – Don’t be jealous of my stunning gold backsplash or putrid yellow countertops – they’re… antiques. Also, I have over 450 photos of the process, so if you want any more, just ask. Thanks again!
Baker’s site: lostinashleyland.blogspot.com/