2D 1
The Gaming Revolution
by Hope Geiger @Minervas.Owl · submitted Aug 16, 2010 · 2010 contest
1 / 21
Description
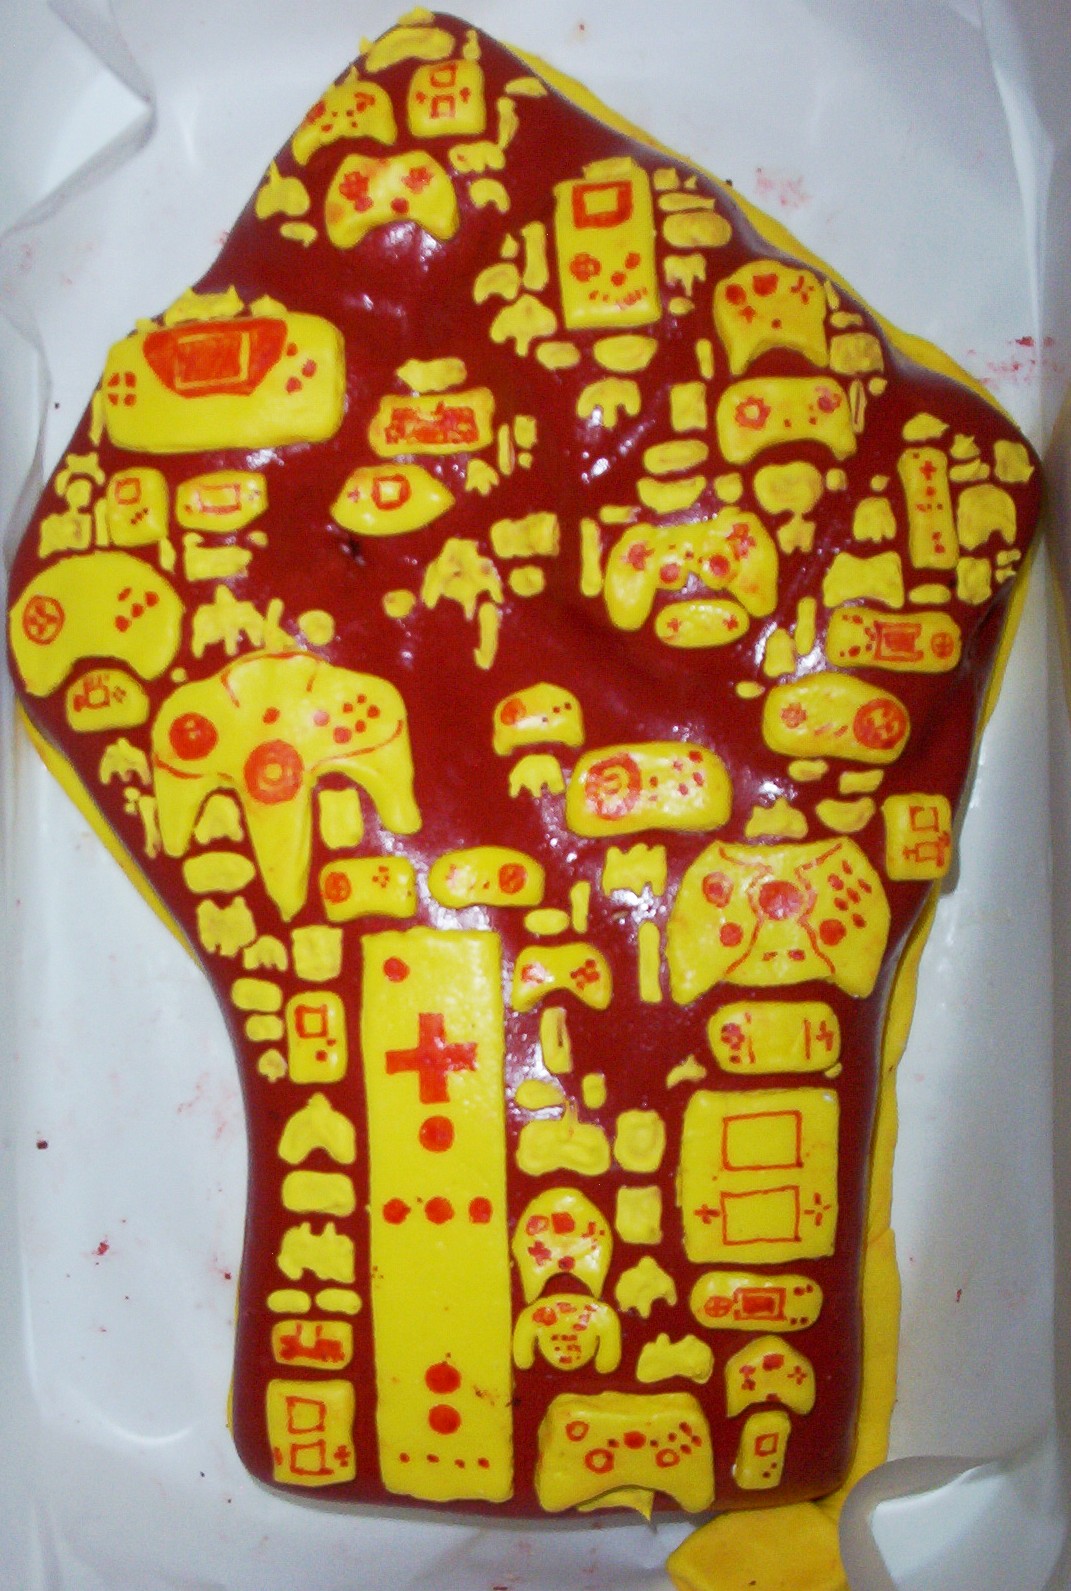
A group of us like to hold game nights every couple of months where we try out the old game systems, like the original Nintendo and Atari. When I saw the design for this shirt, I thought would be a great cake concept for our next party. Part of the challenge was the level of detail in such a complicated design, so I wanted to be as exact as possible considering this was my first attempt at cake decorating.
The entire process took about 2 days. The first day I baked the cake, red velvet, in a 9 X 12 glass plan. I also made the fondant and royal icing that first night so it could sit overnight. The fondant was made from scratch using a marshmallow recipe I found online. I added the food coloring prior to adding the powdered sugar, since I knew both the yellow and the red needed to be vivid to match the quality of the shirt. Pale colors wouldn't get the same effect. TO get that deep red color, I used a combination of red gel food coloring and cocoa powder. The yellow was just yellow gel food coloring. I also made the cream cheese icing and royal icing that first night so I could have it ready to use the next day.
On day 2, I started putting everything together. I started by carving the red velvet cake into the fist shape using my paper template. I had created several paper templates by blowing the design up on a copier and creating different for different stages. One for cutting, one for the controller shapes, and one to shape the fist sections. I wanted the top of the cake to have a raised effect, so all the cake I carved off the side was used to create the raised finger sections. Everything was dirty iced and then I put the cake in the refrigerator to harden while I worked on the fondant.
For the yellow sections, I wanted the larger controllers to be raised as well, so I formed those out of yellow fondant. Once I formed the larger controllters, the red details were added with a red food writer. After rolling out the red fondant, I covered the cake and smoothed it out. Using the templates I added the yellow fondant pieces in the appropriate places. For those smaller yellow items, I added them last using yellow royal icing. To finish off, I used the left over yellow fondant to create a rope border around the bottom edge of the cake, ending with a plug to make the entire cake look like its own remote.
Overall I think the cake turned out pretty well considering this was my first attempt and everyone loved it at our last game night. Long live the Gaming Revolution!