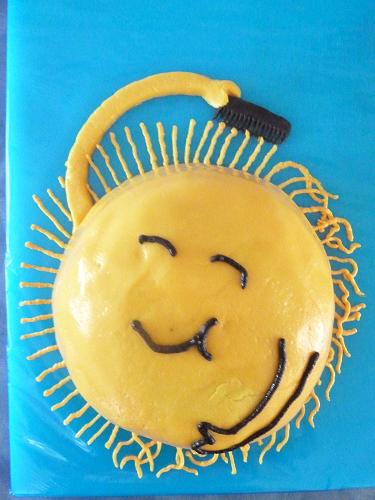
2D 1
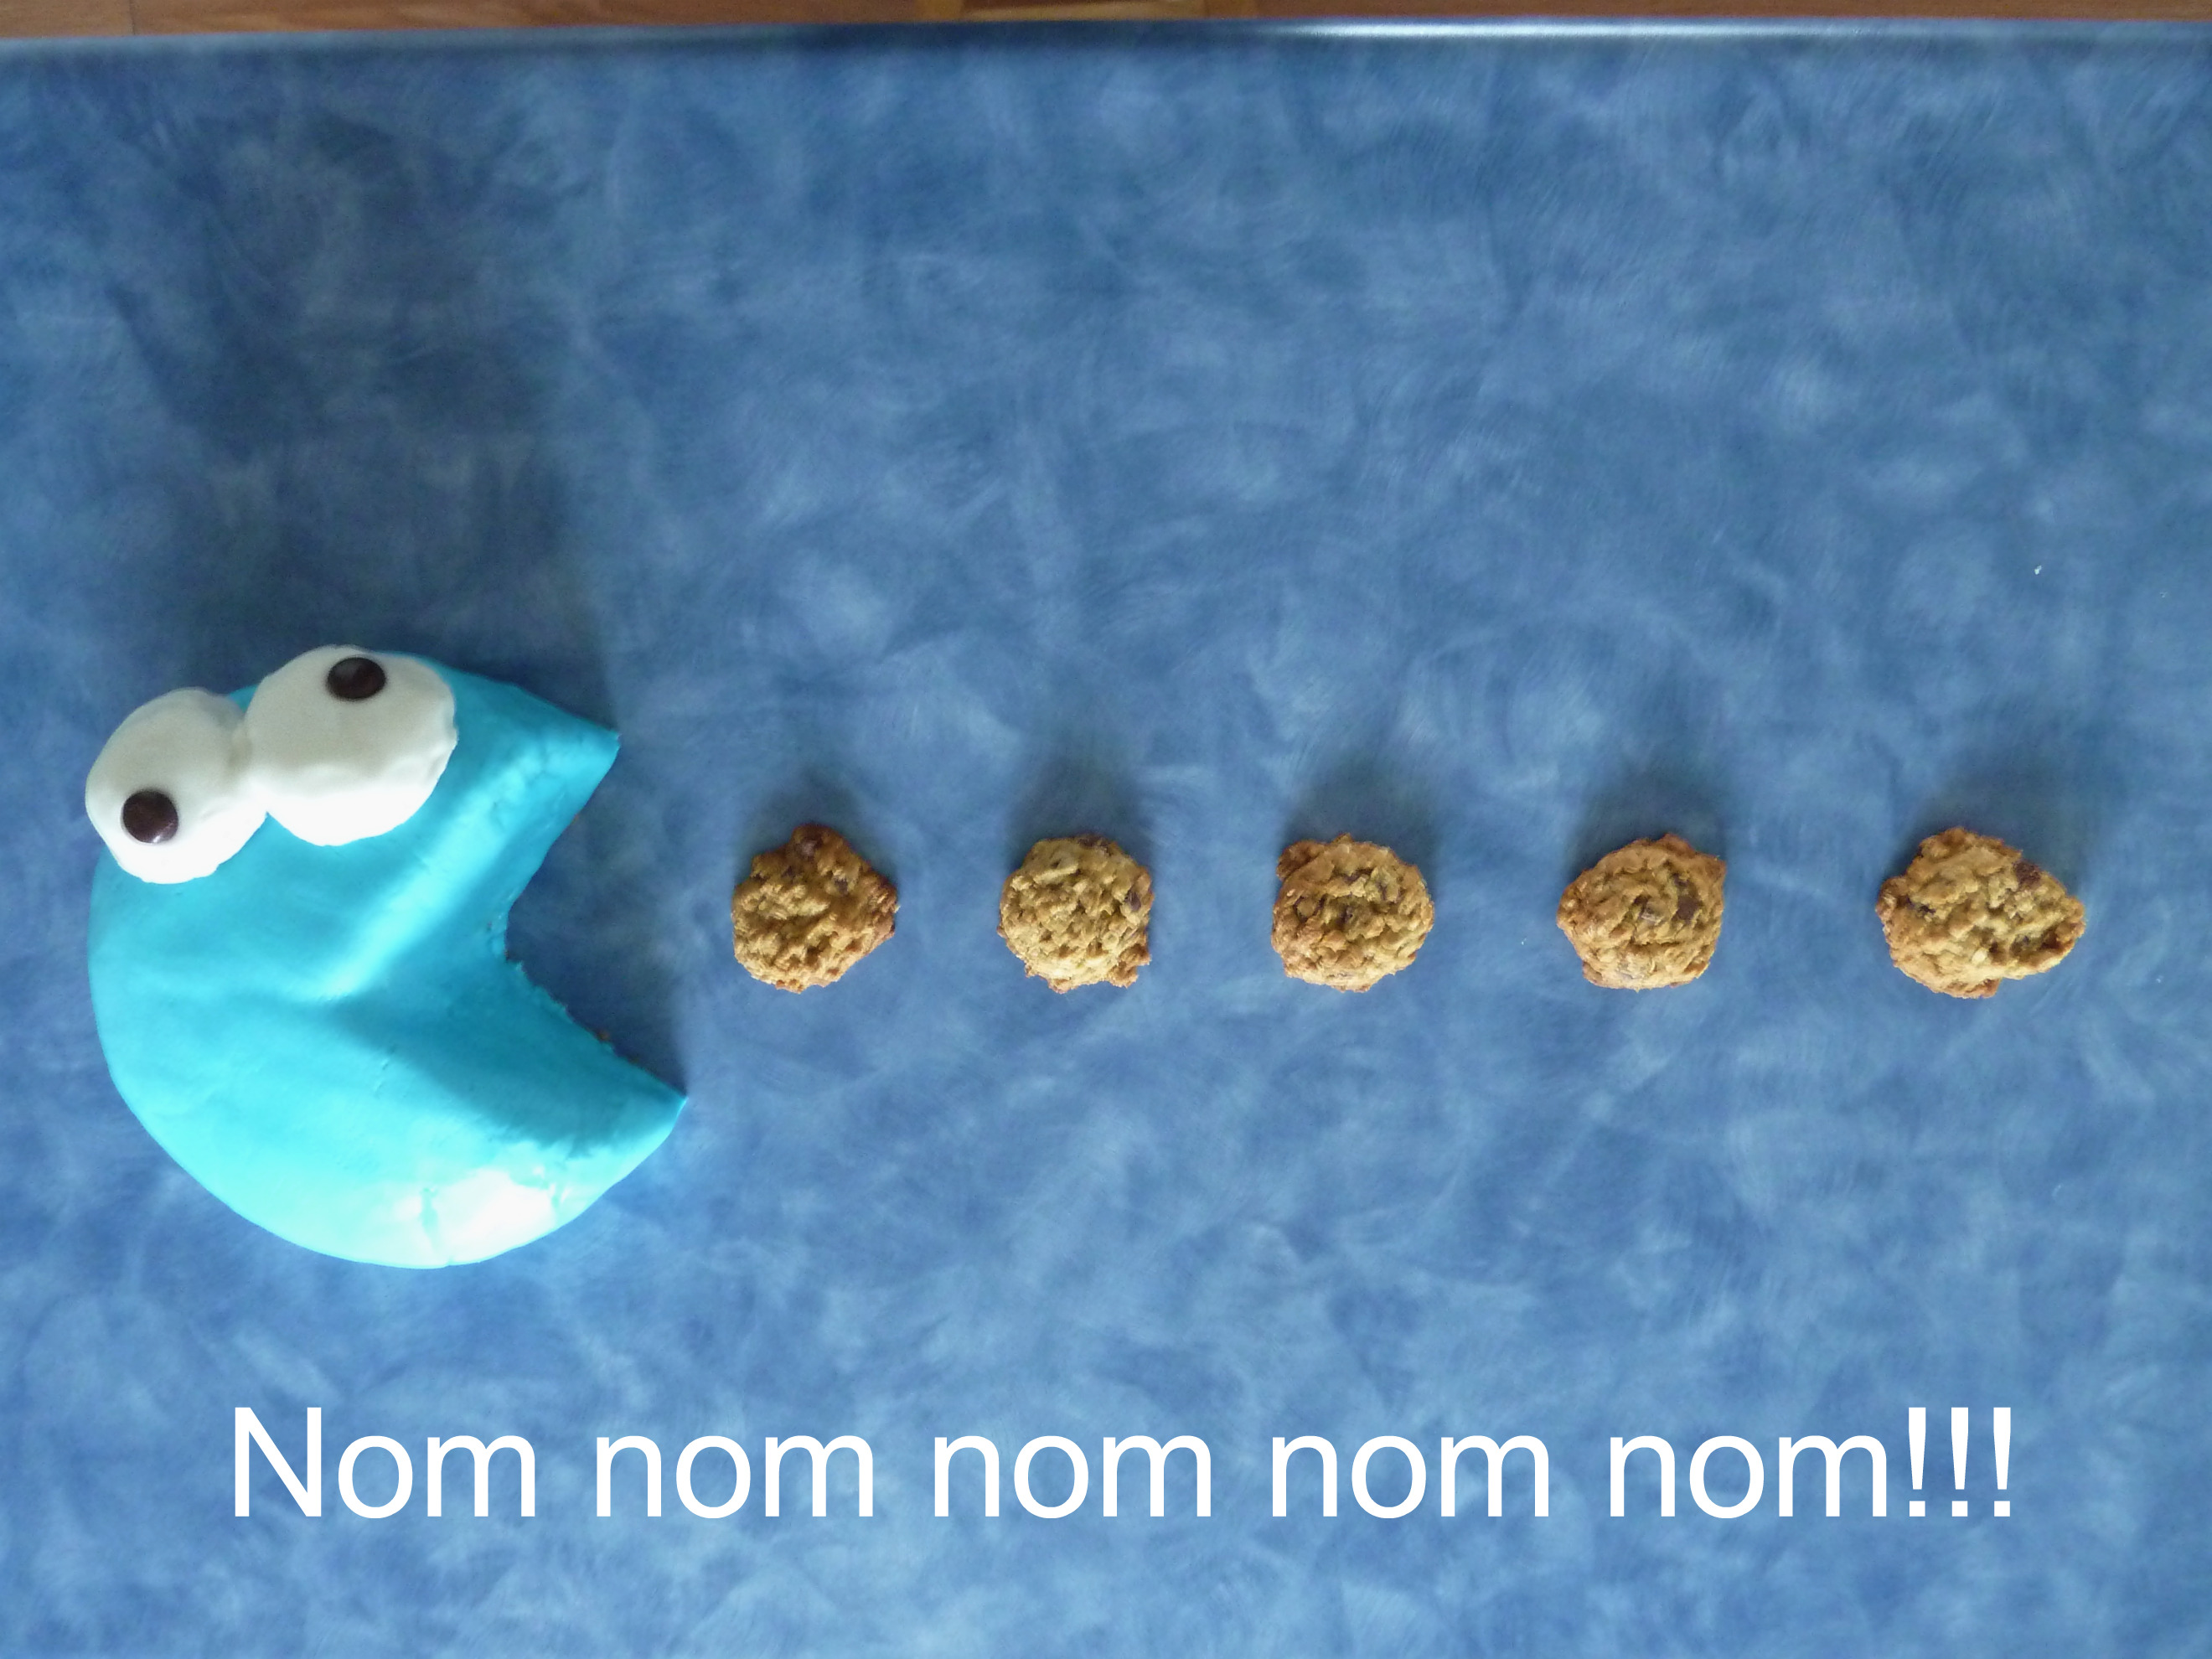
Cookie Loves Milk
by Karilee Schmeckpeper · submitted Aug 16, 2011 · 2011 contest

1 / 16
Description
I chose “Cookie loves milk” because it’s so cute and simplistic. It also helps that the back drop is blue and so is my countertop so it makes a great place for displaying and photographing it.
Step 1. I mixed up two boxes of yellow cake mix and split it between my 9x13 pan and a small five inch round foil baking pan. This way my 9x13 would have about one and two thirds cake mix in it to bake completely full and giving me more dimension to work with. On box worth tends to be rather flat. After baking and some basic trimming I used my cutting wire and a knife to try to cut one end of the cake to look more like a carton top. In hind sight I should have cut some angles in from the sides to match the picture better.
Step 2. I made my favorite frosting which consists of 1 box of French vanilla instant pudding mix, ½ a quart (2 cup) heavy whipping cream and ¼ cup powder sugar. This has similar consistency to butter cream but with out tons of butter, shortening, sugar etc. It’s much simpler. I frosted all but the bottom of the 9x13 cake and made sure to have enough left over for using on the cookie portion of the cake. For that I added some chocolate syrup and cocoa powder for changing the color from yellow to light brown.
Step 3. I’ve had a very hard time working with fondant that I’ve made myself so this time I spent the extra money to buy the premade stuff. I bought a box of white fondant and a box with 4 already made colors. I would definitely need the white and red. I found that the best way to apply my fondant was to roll it out onto a large sheet of aluminum foil coated in powder sugar. Usually I’ve tried to lift the foil and fondant up and onto my cakes and then peel the foil off with pathetic results. So this time I decided to put the prepared/frosted cake onto the fondant, wrap it up the sides and over onto the bottom of the cake. Then with help flip it over onto the display board. Having the foil powdered well really helped. This way worked much better for me.
Step 4. For the arms and legs I used the roller to squish flat some large Tootsie rolls, then cut them into strips and cut fingers at the ends with a knife & a pizza cutter. I then just pinched and squished with my fingers to make feet shapes.
Details: I used chocolate syrup to make the chocolate chips on the cookie after I frosted it. And dot the eyes on the milk & the cookie and also to write the “I love you” on a piece of white fondant for the speech bubble. I eventually used two chocolate chips for the cookie eyes. I made the whole thing on Friday. After all that work and it was so stinkin cute, I didn’t have the heart to cut into it until Sunday. But of course, I had to eventually so I could complete the assignment. ;)